
My brakes had been squealing for a while, so it was time to pull the calipers and apply some disk brake quiet. Since I was going to have all the calipers off, I decided it would be a good time to try different street pads. I'd like a little less sticky brake dust, especially since new wheels and coilovers are going to happen this year. I already ordered KW INOX V3 all the way around, they'll be here in 5 weeks. The wheel plan at the moment is BBS RS-GT 18" with Michelin PS2's.
I decided to try the Axxis Deluxe Plus pads, which I bought from Zeckhausen Racing. Rumored to dust a lot less than the stock pads, and performance-wise they look a lot like the Metal Masters on paper.
Do the usual for removing a wheel... loosen the lugbolts (just break them free, don't really loosen them), then jack up the car and support it with jackstands. I chose to do mine side-to-side so I could close the garage door if it started raining. So I broke free the lugbolts on both wheels on one side and put the car up on the jackstands.

Remove the unweighted wheels. This is easy if you remembered to loosen the lugbolts before lifting the car. :-) If it's the first time you've removed your wheels, they might be stuck on the hub. If that's the case, leave a couple of lugbolts loosely in place, and hit the back of the wheel with a rubber mallet. Hitting the tire will often work, but if not, try hitting the rim and the tire at the same time. You shouldn't need to hit it hard.
Remove the spring clips. The easiest way to do this is with a pair of pry bars. Use a largish one to compress the spring clip and a medium sized one to pry the clip out while it's compressed. I used an 18" for compressing and a 12" for prying. This is exactly the reverse of how you install them (but installation is easily done with your hands, no tools). Doing it this way takes 2 seconds and no effort or cursing. Watch yourself though, and don't do it with a car behind you. The clip can spring a few feet away when it comes off. It's not heavy or dangerous, but you don't want it to nick one of your other cars.

If working on the left front or right rear wheel, pull out the pad wear sensor. It comes straight out. I used needlenose pliers. One of mine had a crack in it, so part of it crumbled apart. They're P/N 34.35.2.227.385. $13.69 each from Bell BMW, I ordered one to replace my cracked one and another as a spare.
Remove the plastic plugs covering the guide bolts on the back of the caliper. They'll pop right out of the rubber surround using just your fingers. Then remove the guide bolts (7mm allen). I didn't take any pictures here.
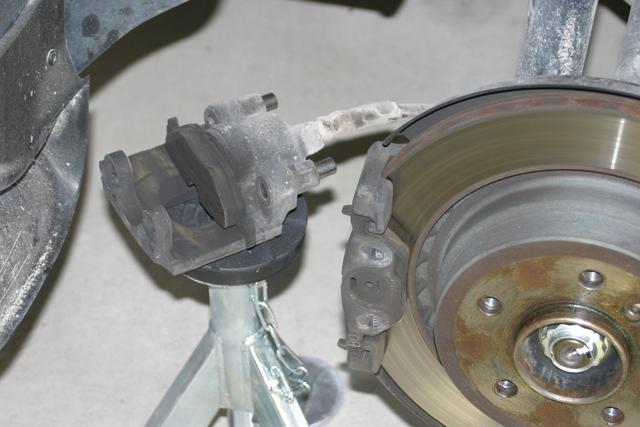
Now the only thing holding the caliper to the rotor is the caliper itself. If your car has been sitting for a while, it might just slide right off. If not, apply steady pressure to the back of the caliper. I just grab the whole caliper with both hands and lean back for a while. Give it 30 seconds or so and it should move enough to let you slide the caliper off of the rotor. Once off, don't just let it hang by the brake line; put it on a jackstand or the like. The inside brake pad will come with the caliper, while the outside brake pad will usually stay in the hammer guides.
Pop the inside brake pad out of the piston, and pull the outside pad out of the hammer guides.

Up to this point things are a cakewalk, and no more than 15 minutes should have passed. After you've done one, all of this goes very quickly.
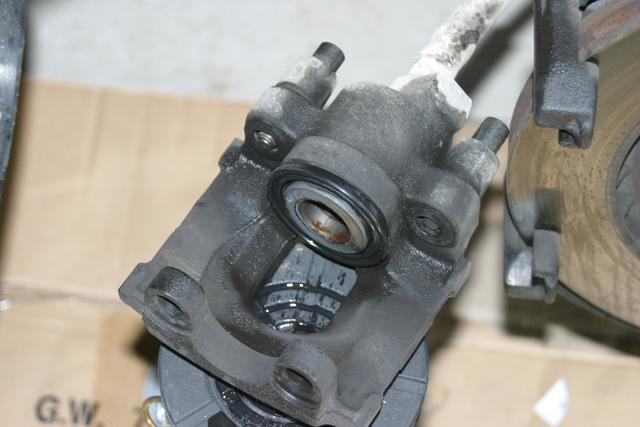
Thoroughly clean the inside of both halves of the caliper. Brake cleaner works well, but wheel cleaner and then water will work too. You want a clean surface for the disk brake quiet. If you live on a dirt road or are replacing stock pads, the dust cover around the piston is probably full of brake dust mud or road mud. There's a groove in it that traps it. I used Q-tips to clean it out. Inspect it and replace it if it's distorted, torn or seems hard. I haven't had to replace mine yet, so I won't go into the details. Below is a picture of a partially cleaned half of a caliper.
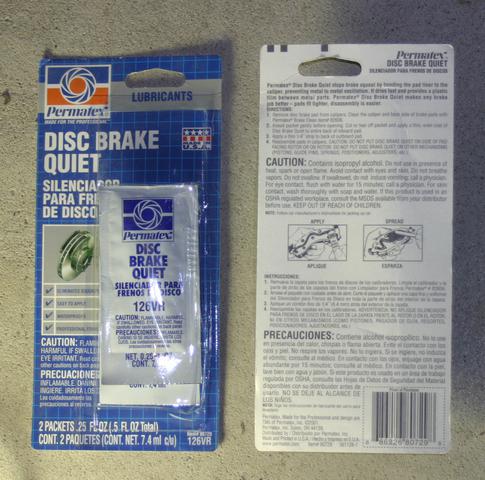
Apply disk brake quiet to the piston top (where it contacts the back of the inside pad), being careful to not get it all over the rubber piston dust cover. I used the Permatex stuff, which is blue and comes in tear packets (like ketchup packets). Normally I'd buy some in a squirt bottle at NAPA, but I was lazy and just went to the local ACE hardware. All they had was the Permatex tear-open packets, which are messy to use.
Apply a thin layer of disk brake quiet to the parts of the caliper that contact the outer pad. Also apply some to the inside of the hammer guides. Rather than detail this here, see the TIS document. I also apply a little to the back of the outside pad, where it contacts the caliper.
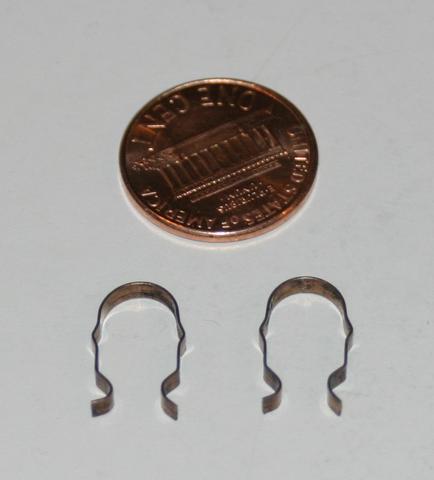
If working on the right rear or left front wheel, transfer the clip that holds the wear sensor from your old inside pad to the new inside pad. The clips look like the picture below.
Insert the new inside pad in the caliper piston.
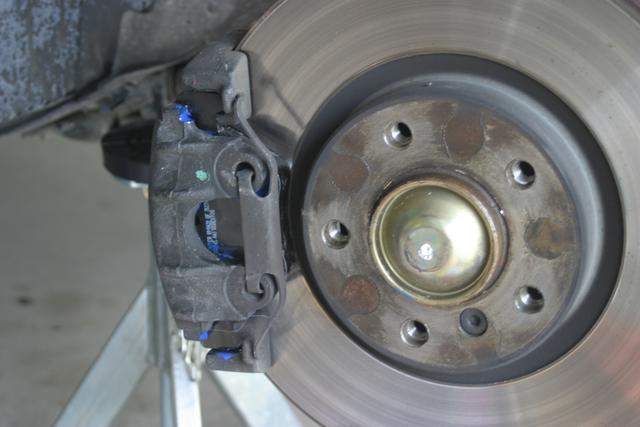
Put the outside pad in the hammer guides and flush against the rotor, and slide the caliper on. Reinstall the guide bolts, and torque to 30 Nm. Reinstall the spring clip. You should wind up with something like the picture below.
If working on the right rear or left front wheel, insert the pad wear sensor.
Before reinstalling the wheel, put a thin coat of grease on the face and hub-centric part of the hub. This helps prevent corrosion and prevents the wheels from getting stuck to the hub as a result. You only want a very thin layer here; you really don't want a glob of grease to be able to find its way onto your rotor. :-)
Even better, use an anti-seize. Kopr-Shield works O.K. here, but I prefer a copper/graphite/aluminum compound with a very high temperature rating. I've been using SAF-T-EZE Anti-Seize, which is good to 2000F.
Results
It's too early to tell how well the Axxis Deluxe Plus bite compared to the stock pads, I haven't broken them in yet. Maybe it'll stop raining tomorrow and I'll get to break them in and test them on dry pavement. It's also too early to give an impression of the dusting. All I know at this point is that my brakes aren't squealing anymore, but I think the same would be true if I had just put new disk brake quiet on the stock pads. The stock pads had good bite for street pads but they generate a lot of clingy black dust. They seem pretty rotor-friendly at street temperatures, but with my current mileage it's hard to tell.
Measurements
I measured the thickness of my right rear rotor, it's at about 20.8mm. The minimum thickness is 17.4mm according to the TIS.
I will measure the thickness of the left front rotor when I install the new brake pad wear sensor.
All Pictures
Other Brake Work
August 14, 2004I ordered StopTech stainless steel braided Teflon brake lines from Zeckhausen, tacking them on to an order for Axxis Deluxe Plus pads for our new Audi TT 3.2 roadster.