Dremel US40 Ultra Saw first impressions

On July 19, 2017 I bought a Dremel US40 Ultra Saw kit from Home Depot for $99 (marked down from $129). It came with 4 blades, the handle, the Allen wrench for blade changes and a carrying bag.

I bought it mainly for trimming off hardwood flooring at the wall after installation. I don’t normally need to do this, but occasionally I’ll cut a board a tad too long. Since my sliding compound miter saw is in the garage, it can be a hassle to run back and forth from the second floor (where I’m installing flooring right now) just to trim 1/8″ off of a board. It ruins my mojo.

I’d love to own a Festool TS55 or TS75, but the reality is that it’s a lot of money for a tool I don’t desperately need at the moment. I own a table saw, a sliding compound miter saw, a circular saw, a Bosch handheld jigsaw, a reciprocating saw (which I’m misplaced!), an oscillating tool, a 5″ variable speed grinder, a tile wetsaw, a metal chop saw, etc. A TS55 or TS75 is the king of accurate breakdown of sheet goods, but all I needed today was a means of trimming off hardwood flooring post-installation.

The Dremel US40 works well for this task. The main drawback is that it creates a tremendous amount of dust due to the blade design. The dust port adapter is nearly impossible to find in a store or online, and the reviews are not favorable because it falls out too easily. And it looks like an afterthought to me; the dust port on the saw is tiny and on the opposite side of the saw body from the blade, at a 90 degree angle. And when using the flush-cut blade, I suspect it does nothing at all since the flush cut blade is outside of the blade guard.

The second drawback: the blades are pricey and I suspect they don’t last very long. This has been one of my complaints about Dremel for a long time. They’re like the Gillette of tool companies: the tools aren’t terribly expensive, but they gouge you for blades, grinding wheels, etc.

But the tool itself is not bad. I think it’s more versatile than the Rockwell Versacut and similar, mainly because it can make an almost flush cut. I can’t speak to the longevity yet, but for $99 I’m not expecting the worm drive to last forever. But for special uses, I think it’s a good tool. For heavy, rough work I have better, more robust tools.

One thing that would make it a better tool: variable speed control. 17,000 rpm is fine for cutting wood, but I can imagine wanting a slower speed when cutting metal. Not to mention using the surface prep wheel.

A foot attachment that allowed miter cuts would also be nice, though I realize it would be limited since the depth of cut at 90 is already shallow at 3/4″.

The bag is definitely not something to write home about. No padding, no pockets, etc. I’ll wind up putting everything in a Systainer 2 at some point.

Hoover F5853-900 motor replacement

The replacement motor for my old Hoover F5853-900 arrived today from an eBay seller.

By looks alone, the new motor won’t hold up as long as the old one did. However, looks can be deceiving. And I don’t expect to get another 15 years out of this carpet cleaner anyway, at least not as my primary cleaner.

I installed the new motor. An interesting side note… on the impeller end of the new motor, there was a guard. This part isn’t used in my SteamVac, and is easily removed without tools. However, I can envision why it’s there on newer units. One of the things that happened with my old motor: once the bearing had too much play, the impeller rubbed and melted some of the housing in the vacuum base. The guard that’s unused on my SteamVac would serve as a sacrificial part when the motor or impeller fails. It would also prevent large foreign objects from ever hitting the impeller.

After reassembly, I ran the cleaner on the rug in the kitchen. It’s running almost like new. No unpleasant motor noises, no leaks. Hooray for getting my carpet cleaner back in working order for $60!

If I wind up with a functioning carpet cleaner for a year, I’ll be a very happy camper. With the original motor having gone bad, this carpet cleaner was rescued from the landfill.

No pictures taken because I’m still under the weather and just wanted to get it done. The motor I bought was listed as “Genuine Hoover Steam Vac 7.9 Amp Motor 43576202” and came from seller glenmullet.

Making my own swirl spotting light (like a 3M Sun Gun)

I’ve wanted a 3M Sun Gun since I first saw one. A great tool for paint work and detailing, alongside an LED flashlight (I’m using a Maglite XL200 at the moment). This type of light has a 4700K “daylight” bulb for true color rendering. However, I don’t care all that much about the color accuracy. My intended use is for swirl spotting when polishing a car, and the 3M Sun Gun is expensive. A simple 12V light kit using an off-the-shelf MR-16 bulb should not have a street price of $400, with an extra NiCad battery costing near $90 and a bulb that lists at $504 for a case of 6!

Thanks to several Internet forum posts in various places, particularly the post from Starscream88 on Bimmerfest, I created my own for a LOT less using a 12V cordless drill as the base. Ordering parts from Amazon, I spent $92. That includes the drill with battery and charger, an extra battery (for a total of 2), a charger, a tailed bulb socket, the correct bulb, a spare bulb and the soft case that was included with the cordless drill. I may add a 40mm 12V fan to help keep the bulb cool, especially since I intend to fiddle with a 50W bulb in place of the usual 35W bulb.

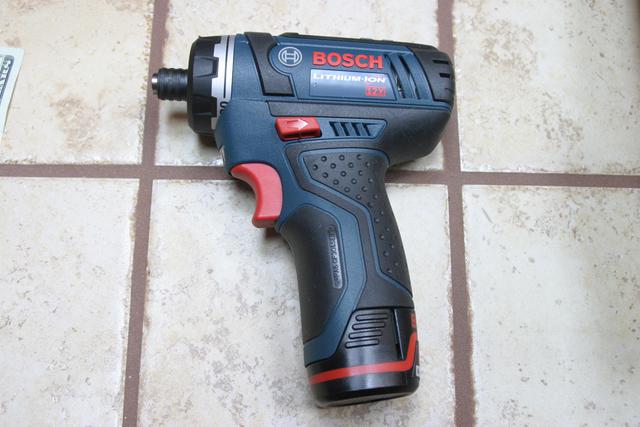
The drill I’m using as the base is a Skil 2240-01 from Amazon which was $40.97. To connect the bulb, I am using a Leviton 80054 miniature bi-pin base, which has wires pre-attached. It was $4.64 at Amazon. The bulb is an EiKO 35003 SoLux True Daylight Flood 35 Watt MR16 Halogen Lamp, 36 Degree Beam Angle. It was $7.95 at Amazon. No additional parts are needed, so you can put together this setup for a total of $40.97 + $4.64 + $7.95 = $53.56. That’s about 87% cheaper than the 3M Sun Gun. I added an extra battery ($32.97) and a spare bulb to bring my total to $92, which is still only 23% of the cost of a 3M Sun Gun kit which has one battery and no spare bulb.

The Skil 2240-01 drill kit, extra battery, Leviton 80054 bulb base and an EiKO 18003 SoLux True Daylight Flood 50W MR16 36 Degree Beam Angle bulb arrived today. The EiKO Solux 35W bulbs won’t arrive until next week.

I took the drill apart by removing the eight Torx T10 screws.

I then removed the chuck assembly (it slides off of the motor easily).

I then snipped the wires from the motor and removed it. Testing the bulb fitment, I wanted the bulb to be close to the front edge of the housing. There is a surrounding groove here formed by two ridges that is near perfect, except that the rearward ridge is too small in diameter. This means that the housing won’t go back together nicely as is, because the rear surrounding ridge hits the bulb housing right behind the lens before the drill housing halves are fully seated. The solution is to Dremel off enough of this surrounding ridge to let the bulb install snugly without preventing the housing from going back together. I removed about 5/32″ of it, by hand with a cutting wheel on the Dremel. This allowed a perfect fit of the bulb.

I twisted the bulb socket wires to the power leads, put a bit of solder on them to prevent strand breakage, then installed some small wire nuts. This will make it relatively easy to replace the bulb socket someday if necessary.

For the heck of it, I hooked up the 50W bulb and tried the light. It works fine, though the drill’s current control circuit emits a faint high-pitch squeal when the trigger is pulled less than halfway. I’m assuming it does the same with the drill motor under high load, you just can’t hear it over the drill motor. Given that I’ll only have the light on for a few seconds at a time, it appears that the 50W bulb does not get hot enough to cause problems. However, it’s crazy bright… I’d probably need sunglasses to use it. I’ll try the 35W bulbs when they arrive, which will be easier on my eyes and should be plenty sufficient given that it’s the same bulb that’s in the 3M Sun Gun.

In any event, it turned out nicely.

And it fits in the case with the charger, extra battery and spare bulb.

More pictures are available in the photo album.

March 10, 2012
The 35W Solux 4700K bulbs arrived this week. Today I replaced the 50W bulb with one of the 35W bulbs. I think this will work better than the 50W bulb; the reflection is less blinding. A 35W spare and the 50W both fit in the carrying case. Now I just need to order a Torx T10 driver to leave in the carrying case, probably a Wiha SoftFinish.

Bosch CLPK27-120 (PS21, PS41 and charger)

Today I purchased a Bosch CLPK27-120 from Lowe’s. It’s a bundle consisting of the PS21 12V Pocket Driver, PS41 Impact Driver, two BAT412 batteries, a BC430 charger and a carry bag for all of it.

These are nice tools for my intended purpose. For starters, my old Bosch Ni-Cad drill is getting long in the tooth; it’s seen a lot of use over the many years I’ve owned it, and it’s been dropped many times. The batteries are no longer available, and they don’t hold a charge like they did way back when. Yes, I could have the batteries repacked. However, the reality is that the new lithium-ion tools are much more powerful and I needed a backup anyway, since I don’t know when my old Bosch cordless drill might die completely.

These 2 tools are intended for my automotive tool cart. They’ll be used to run nuts and bolts quickly. They’re small, fairly light, well-balanced and comfortable. For small 12V tools, they’re capable of quite a bit of torque, and the PS21 drill on its lowest clutch setting is unlikely to strip anything, including trim screws that are threaded into thin speed nuts. The batteries charge in about 30 minutes.

The bag is thin and not very protective, but it’s mostly immaterial to me. I will likely buy a Tanos Systainer to hold everything.

Bosch PS41

Bosch PS41

Bosch PS21